 Skip to content
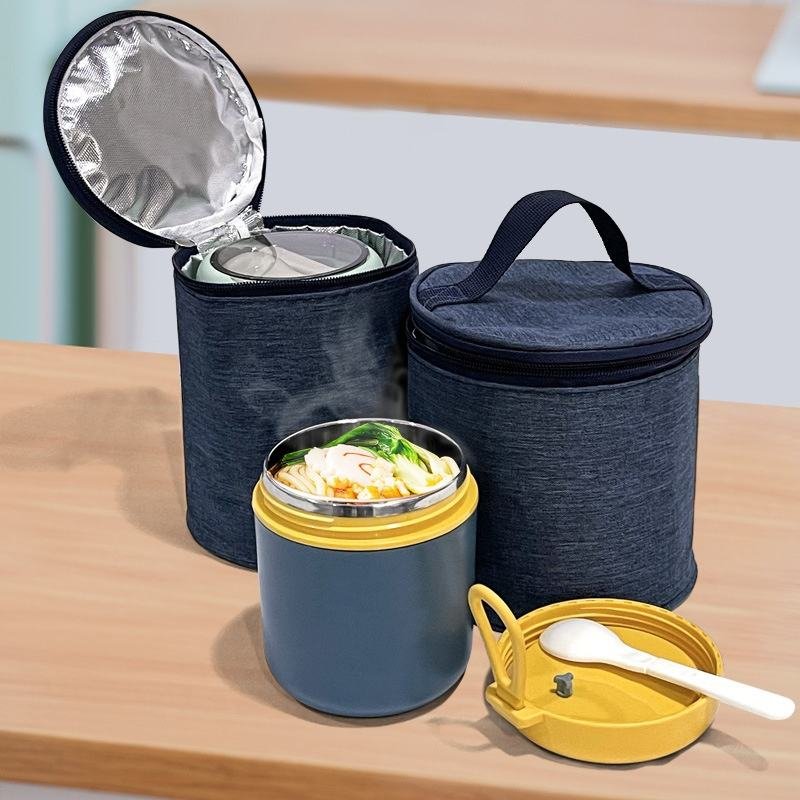
A cooler bag looks simple until two bags with almost identical dimensions are placed in the same hot environment and produce completely different results. One may keep chilled drinks comfortably cold through an afternoon, while another warms much faster even though both have a silver inner lining and visibly padded walls. The difference usually has less to do with one impressive-looking material and more to do with how the entire insulated structure is designed, assembled, packed, and used.
Cooler bag insulation works by slowing heat transfer from the warmer environment into the colder space inside the bag. Foam provides much of the resistance to conductive heat flow, reflective liners can help reduce radiant heat gain, and zippers, seams, openings, bag shape, ice packs, and loading conditions influence how quickly heat enters. A cooler bag preserves an existing cold condition; it does not actively create cold.
That distinction matters when comparing products or developing a new cooler. A thick wall is not automatically a high-performance wall, a shiny liner is not automatically the primary insulation layer, and a claimed cold-retention time means very little unless the test conditions are known. Once the cooler is viewed as a complete thermal system rather than a fabric bag with foam inside, the design decisions become much easier to understand.
How Does Cooler Bag Insulation Work?

Cooler bag insulation slows the rate at which external heat reaches chilled contents. The foam layer provides most of the resistance to heat conducted through the walls, reflective surfaces can reduce part of the radiant heat load, and the closure system limits warm-air exchange. Actual performance depends on the complete construction, including the lid, base, seams, openings, internal load, and surrounding temperature.
Three Paths of Heat Transfer
A cooler bag is exposed to conduction, convection, and radiation at the same time. Conduction occurs when heat moves through the solid layers of the bag. If the outside surface is warmer than the inside, heat begins moving from the shell through the foam and liner toward the colder contents. The purpose of the insulation layer is to slow that movement by placing a low-conductivity material between the warm exterior and the chilled interior.
Convection becomes important wherever air can move. Each time the zipper opens, some of the cooler internal air mixes with warmer surrounding air. The effect becomes more significant when the opening is large, the bag is opened frequently, or the lid does not sit evenly around the perimeter. This is one reason a delivery cooler that is opened repeatedly can behave very differently from a picnic cooler that remains closed for several hours.
Radiation is another heat-transfer path. A dark outer surface under direct sunlight can become much hotter than the surrounding air, increasing the thermal load on the insulation. Reflective inner materials can contribute to managing radiant heat, but they do not replace foam. The best results come from controlling all three heat-transfer paths rather than relying on one material to perform every function.
How the Layers Work Together
A typical soft cooler uses several layers because insulation, durability, cleaning, moisture control, appearance, and structure cannot usually be handled by one material. The outer fabric may be polyester, Oxford fabric, nylon, tarpaulin, or another coated textile selected for abrasion resistance, appearance, weather exposure, and sewing behavior. Beneath that shell sits the thermal layer, which may use PE, EPE, XPE, EVA, PU, or another foam system depending on the product.
The inner lining performs a different job. PEVA, foil-laminated materials, TPU, PVC, and other easy-clean liners are commonly used to separate moisture and food packaging from the foam structure. The liner can improve cleaning and containment, while some reflective versions also contribute to radiant heat control. However, the liner should not be confused with the main thermal barrier because the foam usually provides much of the resistance to heat moving through the bag wall.
A meaningful cooler specification therefore describes more than the outer fabric and inner liner. It should also identify the foam type, nominal thickness, location of insulated panels, lid construction, bottom construction, closure type, lining system, and any structural reinforcements. Without that information, two bags that look almost identical can be built very differently beneath the surface.
Does a Cooler Keep Cold In?
People commonly say a cooler “keeps cold in,” but the more useful technical explanation is that it slows heat coming in. Cold is not stored inside the insulation. The bag begins with chilled food, refrigerated beverages, ice, frozen gel packs, or another cold source, and the insulation reduces how quickly surrounding heat reaches those colder objects.
This explains why a cooler bag cannot quickly chill a room-temperature load without a cold source. If several drinks are loaded at 22°C and no ice or gel packs are added, the insulated wall has no active mechanism for pulling heat out of those drinks. It may slow additional warming if the surroundings are hotter, but it cannot function like a refrigerator or compressor-driven cooling system.
The same principle explains the benefit of pre-chilling. Six cans loaded at 4°C require far less cooling energy from the ice packs than six identical cans loaded at 22°C. The colder starting load gives the insulation system an easier job because the cold source can spend more of its capacity absorbing incoming environmental heat instead of first cooling warm products.
Why Similar Bags Perform Differently
Two cooler bags can use the same outer fabric and the same nominal foam thickness yet perform differently because finished construction introduces many other variables. One may have continuous insulation through the lid and side walls, while another leaves thin zones around the zipper or corners. One may use a stable base that keeps the bag square, while another collapses when fully loaded and creates gaps around the opening.
Foam compression also changes the real structure. A specification may call for 10 mm foam, but sewing, binding, handle attachments, and tight turns can compress sections considerably. If large areas near the lid, base, or seams become thinner after assembly, those zones can allow heat to move more quickly than the central wall panels.
This is why cooler performance should not be judged only by touching the padding. A professional evaluation looks at foam continuity, lid geometry, seam placement, zipper alignment, finished dimensions, base stability, and temperature performance under repeatable conditions. In many cases, the weakest part of the insulated enclosure matters as much as the thickest part.
Which Insulation Materials Are Used in Cooler Bags?

Cooler bags commonly use PE, EPE, XPE, EVA, or PU-based foam together with PEVA, aluminum-foil laminates, TPU, PVC, or other easy-clean lining materials. Foam usually provides the primary thermal resistance, while the liner manages moisture, cleaning, and containment. The most suitable combination depends on flexibility, structure, durability, cold-retention targets, weight, manufacturing complexity, and cost.
PE, EPE, XPE, EVA, and PU Foam
Foam materials should be compared by their behavior in the finished product rather than by name alone. PE and EPE are widely used in lightweight insulated products because they are relatively flexible, easy to cut, and suitable for sewn constructions. They are common in lunch bags, promotional coolers, insulated totes, and everyday soft coolers where compact size and manageable cost are important.
XPE is another polyethylene-based option that can provide more structural stability in some applications. It can be useful where the side panels need to hold their shape more consistently or where repeated compression is expected. EVA generally produces a firmer feel and is often useful in semi-rigid cooler structures, reinforced lids, shaped panels, or molded cooler cases where appearance and structural stability are important.
PU-based insulation can be considered for projects where stronger thermal performance or more rigid insulated structures are needed, although the practical result depends heavily on formulation, density, thickness, processing, and the complete wall construction. It should not be assumed that one material family is automatically superior in every application.
| Foam Type | Typical Feel | Common Application | Main Trade-Off |
|---|---|---|---|
| PE | Flexible | Everyday cooler bags | Performance varies by grade and thickness |
| EPE | Light and soft | Lunch and promotional coolers | Lower structural support |
| XPE | More stable | Structured soft coolers | Higher material specification |
| EVA | Firmer | Semi-rigid cooler designs | More bulk and stiffness |
| PU | Application-dependent | Higher thermal-performance systems | Processing, weight, and cost |
These descriptions are practical tendencies rather than guaranteed thermal rankings. The actual grade, thickness, density, panel design, and finished-bag construction still need to be considered together.
Is Aluminum Foil Really Insulation?
The silver surface inside many cooler bags is visually distinctive, which is why it is often given more credit than it deserves. Aluminum-foil laminates and other reflective surfaces can help reduce radiant heat transfer, but they do not usually replace the foam layer that slows conductive heat movement through the wall.
A thin promotional cooler can therefore have a bright metallic lining and still provide modest cold retention if there is very little insulation behind it. Conversely, a cooler with a less visually dramatic inner surface can perform better if it uses a more appropriate foam system, better lid insulation, tighter closure geometry, and more continuous panel construction.
The reflective liner may still provide useful secondary functions. It can create an easy-clean interior surface, provide a barrier between products and foam, and form part of a laminated wall system. However, the visual appearance of the liner does not reveal its backing, thickness, adhesion, seam durability, or cleaning resistance.
When comparing samples, it is more useful to inspect what sits behind the silver surface. Foam material, nominal thickness, panel continuity, lid insulation, bottom insulation, and zipper construction usually tell much more about expected performance than the brightness of the liner itself.
PEVA, TPU, and Other Linings
PEVA is commonly used in lunch bags and general-purpose soft coolers because it provides a flexible and cleanable inner surface without adding excessive weight. It can work well where normal condensation, chilled food packaging, beverage cans, and routine wiping are expected. TPU and PVC-based liners may be considered for projects that require stronger moisture handling, more robust containment, or specific welded or laminated construction methods.
The liner should always be selected according to the actual use environment. A children’s lunch bag may prioritize low weight, easy cleaning, odor control, and flexibility. A commercial delivery bag may need surfaces that tolerate frequent cleaning and exposure to spills. An outdoor soft cooler may require more resistance to abrasion from cans, bottles, ice, and repeated packing.
It is equally important to distinguish between a water-resistant liner material and a leak-resistant finished compartment. Even if the liner film itself resists water, stitched seams, needle holes, zipper locations, corners, and binding areas may still allow leakage. A finished product claim should therefore be based on complete construction and testing rather than simply naming a liner material.
This distinction prevents a common sourcing mistake: specifying “TPU lining” or “PEVA lining” as though the material name automatically defines finished performance. The liner is one component of the system, not the entire system.
Matching Materials to the Use Case
A compact lunch bag, a 30-liter outdoor soft cooler, a cooler backpack, and a food-delivery bag may all require different insulation systems even though they belong to the same broad product category. The lunch bag may need to remain lightweight and easy to fold. The outdoor cooler may justify thicker insulation and a more abrasion-resistant shell. The backpack must balance insulation with carrying comfort and total loaded weight.
Delivery bags introduce another set of priorities because they may be opened many times during a shift, stacked in vehicles, cleaned frequently, and carried with heavier loads. In that situation, access speed, box stability, zipper durability, liner cleaning, handle reinforcement, and structural support may be just as important as foam thickness.
Material selection becomes much easier when the product brief describes the real use case rather than simply requesting a “premium cooler bag.” Useful inputs include capacity, typical load, expected use duration, opening frequency, ambient environment, carrying style, cleaning method, acceptable weight, outer-material preference, and target price position.
Those variables allow the insulation system to be selected for the job the product must perform instead of selecting materials first and trying to justify them afterward.
How Does Foam Thickness Affect Cold Retention?

Increasing foam thickness generally increases thermal resistance because heat must travel through a greater thickness of insulating material. However, foam thickness alone does not determine cold retention. Conductivity, density, compression, panel continuity, closure quality, bag volume, surface area, loading conditions, and ambient temperature also matter. A thicker cooler with poor openings or weak panel joints may still perform poorly.
Is Thicker Foam Always Better?
From a basic heat-transfer perspective, increasing insulation thickness helps because the thermal path becomes longer. When the same material is used under the same conditions, a thicker layer generally provides greater resistance to heat transfer. That principle is important, but a cooler bag is a portable consumer product rather than a fixed insulated wall.
Increasing foam thickness affects internal capacity, external dimensions, foldability, shipping carton size, sewing difficulty, zipper geometry, and overall weight. A 10 mm foam panel takes more space than a 5 mm panel, which means the manufacturer must either reduce internal volume or increase the outside dimensions. On a compact lunch bag, the added bulk may be more noticeable than the thermal benefit.
Thick foam can also create construction problems around curved zipper paths, tight corners, binding, and handles. If the pattern has not been designed around the added volume, the finished lid may sit unevenly or become difficult to close. In that situation, increasing foam thickness can introduce new thermal weaknesses around the opening.
The best specification is therefore not the maximum foam thickness available. It is the thickness that delivers the required thermal performance while keeping capacity, carrying comfort, shape, cost, and manufacturing complexity within acceptable limits.
Practical Thickness Comparisons
Prototype testing is usually more useful than assuming a certain foam thickness automatically produces a certain number of cold-retention hours. Development teams can build two or three versions using the same bag dimensions, outer materials, liner, zipper, loading conditions, and ambient environment while changing only the insulation thickness.
| Prototype Level | Example Foam Thickness | Typical Direction | Main Consideration |
|---|---|---|---|
| Lightweight | 3–5 mm | Lunch and promotional bags | Compact and economical |
| Standard | 5–10 mm | General soft coolers | Balance of insulation and bulk |
| Heavy insulated | 10–20 mm | Larger outdoor coolers | Added structure, weight, and volume |
| Structured | Multi-layer or molded | Premium semi-rigid systems | Higher manufacturing complexity |
These ranges are useful development references rather than universal standards. A 10 mm cooler should not automatically be described as performing twice as well as a 5 mm cooler because heat transfer in the finished bag also depends on material conductivity, closure design, loading, surface area, and air exchange.
The practical question is whether the thicker prototype improves the temperature curve enough to justify additional material, larger cartons, higher weight, and more difficult sewing. That is a commercial engineering decision rather than a simple material decision.
Density and Compression Matter
Foam density influences how insulation behaves when the cooler is loaded, carried, folded, and repeatedly compressed. A very soft foam can feel thick when the bag is empty but lose a significant portion of its effective thickness when bottles, food containers, or ice packs press against the walls.
The bottom panel deserves particular attention because a fully loaded cooler can place several kilograms of weight onto a relatively small area. If the foam compresses heavily, the base may lose both thermal resistance and structural stability. Similar compression can occur around handles, shoulder-strap anchor points, corners, and tight zipper assemblies.
Compression recovery also affects long-term appearance. A cooler that does not recover after repeated storage or loading may gradually collapse. That can alter lid alignment, zipper geometry, and the amount of free air around the opening, indirectly affecting thermal performance.
For these reasons, a specification that states only “8 mm foam” is incomplete. A better product record identifies the foam family, grade when available, nominal thickness, approximate density, panel location, and whether reinforcement or additional laminated layers are used.
That information becomes especially valuable when the product is reordered months later and the development team needs to reproduce the same feel and performance.
Bag Size Changes the Calculation
A small lunch bag and a large outdoor cooler should not automatically use identical insulation specifications. As the product becomes larger, total exterior surface area increases, the zipper path becomes longer, the load becomes heavier, and the internal air volume changes.
The relationship between external surface area and internal capacity also changes with geometry. A tall narrow cooler and a wide shallow cooler can hold similar volumes while exposing different amounts of surface to the environment. That difference can affect how much heat reaches the contents.
Larger products often need more structural support as well. A 30-liter bag may require firmer foam, reinforcement panels, a stronger base, or more substantial edge construction simply to prevent the walls from collapsing. Those additions can influence both thermal behavior and manufacturing cost.
For multi-size product programs, testing each important size is more reliable than assuming that the smallest prototype represents the entire range. A practical approach is to test the smallest, middle, and largest capacities under comparable conditions. If the largest SKU warms more quickly, additional foam, a revised lid, or a different packing recommendation can be evaluated before mass production.
How Do Zippers and Seams Affect Insulation?

Zippers and seams can weaken thermal performance because they interrupt the continuous insulation layer and create possible paths for warm-air exchange. Closure type, zipper alignment, lid overlap, seam position, foam coverage, and corner construction all matter. Even high-quality foam cannot fully compensate for a poorly fitting opening, especially when the cooler is frequently accessed during travel, outdoor use, or delivery work.
Air Exchange at the Opening
The opening is one of the most important thermal zones in a soft cooler because it can expose a large part of the interior directly to warm air. When the zipper opens, colder internal air mixes with warmer surrounding air and the food, drinks, liner, and cold packs become more directly exposed to the environment.
A wide U-shaped lid provides excellent access, but it also creates a larger opening than a narrow top zipper. This does not make the design wrong; it simply means convenience and thermal performance must be balanced. A delivery bag that needs rapid access may require a different lid configuration from a picnic cooler that remains closed for most of the day.
Zipper alignment becomes more important when the bag is fully loaded. If heavy contents distort the body, the lid may no longer sit evenly around the perimeter. Small gaps or twisted corners can increase air exchange even though the zipper technically remains closed.
The thermal design around the opening should therefore be evaluated with the cooler loaded, not only when it is empty on a sample table. Lid overlap, foam continuity, zipper smoothness, and edge stability are all easier to judge under real carrying conditions.
Closure Types
Different closure systems provide different combinations of access, sealing, flexibility, cost, and manufacturing complexity. A standard nylon coil zipper is lightweight, familiar to consumers, easy to sew, and suitable for many lunch bags and everyday soft coolers. Its flexibility is an advantage, although it should not be confused with an airtight thermal seal.
More robust coated or water-resistant zippers can be considered where weather exposure and tighter closure performance are important. They can add cost and may require more pulling force, which can affect user experience. The surrounding fabric and pattern must also support the zipper properly or the benefit of the upgraded component may be reduced.
Roll-top closures avoid a long conventional zipper and can create a compact folded opening. They can work well in some outdoor products, but they consume upper-body material and change how quickly the bag can be accessed. Overlapping flaps are another option and can reduce direct exposure around a zipper while adding sewing operations and material.
The correct closure is the one that matches the product’s actual use. Fast access, thermal retention, water resistance, leak control, and consumer convenience are related, but they are not the same performance requirement.
Thermal Weak Points Around Seams
Soft coolers are built from fabric and foam panels rather than rigid insulated shells, so seams are unavoidable. Side walls meet the base, the lid connects to the body, zipper tape is inserted into openings, binding covers raw edges, and handles are attached through load-bearing zones.
These transitions can create thinner sections if the insulation is cut back too far to simplify sewing. For example, if foam stops well before both sides of a corner seam, the center of each wall may be heavily padded while the corner contains comparatively little insulation.
The top perimeter is another common area to examine. Foam may need to be compressed to allow zipper installation and turning, which can create a thinner thermal path around a large part of the bag. The same issue can appear along the base if reinforcement is added without considering insulation continuity.
This does not mean every seam causes serious heat loss. It means the pattern and assembly method should be inspected rather than assuming nominal foam thickness applies everywhere.
A useful sample review checks foam at the center of panels, near corners, close to the zipper, around the base, and beside major attachments before relying on thermal testing alone.
Shape and Structural Stability
The shape of a cooler affects more than appearance. A stable rectangular body can keep the lid aligned, maintain predictable capacity, and distribute foam panels evenly. A very soft bag may collapse when partly filled, changing the way the zipper sits and potentially creating irregular gaps around the opening.
The bottom also influences thermal behavior because it may sit directly on warm pavement, a vehicle floor, a picnic table, or another hot surface. A thin flexible base receives a different heat load from a reinforced base using insulation plus a semi-rigid support panel.
Geometry changes surface exposure as well. Two bags with similar internal capacity can have different total external surface areas depending on whether they are tall and narrow or wide and shallow. More exposed area can create more opportunity for heat to enter.
For this reason, thermal considerations should begin before the pattern is finalized. A visually appealing silhouette may create difficult corners, long zipper paths, weak lid support, or inefficient packing volume. Addressing those issues at the pattern stage is usually easier than trying to compensate later by adding thicker foam.
What Determines How Long a Cooler Bag Stays Cold?
Cold-retention time depends on the complete thermal system, including insulation, starting product temperature, ice or gel-pack quantity, ambient temperature, sunlight, bag capacity, empty air space, opening frequency, packing method, and closure quality. A statement such as “keeps cold for 12 hours” is meaningful only when the starting conditions, test environment, load, cold source, and temperature criteria are clearly defined.
Ice Packs and Starting Temperature
The cooler bag and the cold source perform different functions. The insulation slows incoming heat, while ice or frozen gel packs absorb that heat. If the cold source becomes warm or fully melted, the insulation can still slow further heating, but it cannot maintain the original temperature indefinitely.
Starting temperature can dramatically change the result. Consider two identical 20-liter coolers, each holding twelve beverage cans and two identical frozen gel packs. In one bag, the cans begin at 4°C. In the other, they begin at 22°C. The second set of drinks already contains substantially more heat, so the gel packs must first remove part of that thermal load before they can help maintain a low temperature.
The starting temperature of the cooler itself also matters. A bag stored overnight in an air-conditioned room begins differently from one left inside a hot vehicle. The same applies to gel packs, which can leave a freezer at different temperatures depending on freezing time and freezer settings.
For meaningful comparisons, the starting temperatures of the bag, products, and cold source should be controlled or recorded. Otherwise, the test may say more about preparation than about insulation.
Opening Frequency
Opening frequency can change real-world performance enough to make a closed-bag test misleading for some applications. A picnic cooler may remain closed for several hours, while a food-delivery bag may be opened every fifteen or twenty minutes. A lunch bag may be accessed only once.
Every opening allows warmer air to enter and exposes internal surfaces directly to the environment. Once the bag closes, the chilled products and cold source must absorb the extra heat. The size and duration of the opening therefore matter almost as much as the number of opening cycles.
A controlled development test can separate these conditions. One prototype test may remain completely closed to establish baseline performance. A second test may open the lid for a fixed period, such as 30 seconds every hour, to simulate repeated use. The exact timing is not an industry-wide requirement; it is simply an example of creating a repeatable test.
For delivery products, this type of opening-cycle comparison may be more commercially useful than a long closed-bag retention claim because it better represents how the cooler is actually used during a working day.
Ambient Conditions and Sunlight
A cooler containing products near 4°C faces a much greater thermal load at an ambient temperature of 38°C than at 22°C. The larger the temperature difference between the inside and the environment, the stronger the driving force for heat transfer.
Direct sunlight can make conditions even more demanding. Dark outer fabrics may reach surface temperatures above the surrounding air temperature, increasing the heat that the insulation must resist. The effect can be especially noticeable when the cooler remains stationary in direct sun for extended periods.
Contact with hot surfaces also matters. A bag placed on concrete, asphalt, a vehicle floor, or another heated surface receives conductive heat through the base. Grass, shade, or an indoor floor creates a different environment even when the air temperature is similar.
This is one reason cold-retention claims should always be read together with test conditions. A product that performs well in a 22°C indoor comparison should not automatically be assumed to produce the same retention time in a parked vehicle during summer.
Controlled indoor testing is useful for comparing prototypes because it reduces variation. Separate high-temperature or outdoor simulations can then be used when the target market requires them.
Packing Method and Free Space
Packing method can influence cooler performance more than many consumers expect. A nearly empty cooler contains more air, and that air can be replaced rapidly by warmer outside air whenever the bag opens. A more fully packed cooler usually contains greater thermal mass and less empty space, although airflow around products still affects temperature distribution.
Cold-source position also changes the result. Placing all ice packs at the bottom may keep lower products colder while allowing upper products to warm more quickly. Distributing packs around the load can produce a more even internal temperature, depending on the shape and contents of the bag.
A fair comparison standardizes the loading conditions rather than simply saying that each cooler contained “some ice.” At minimum, the test should control product quantity, product mass, starting product temperature, gel-pack type, gel-pack mass, gel-pack starting temperature, loading arrangement, free air space, and opening schedule.
Without those controls, two cold-retention claims may describe completely different situations. Once the loading method is standardized, differences in the temperature curve become much more useful for evaluating the bag itself rather than the amount of ice placed inside it.
How Is Cooler Bag Insulation Tested?
Cooler bag insulation is best evaluated through repeatable temperature-over-time testing. Ambient temperature, starting product temperature, cold-source quantity, load mass, sensor position, opening schedule, and test duration should be defined in advance. This allows different prototypes to be compared fairly and provides much more useful information than an unsupported statement that a cooler “keeps items cold all day.”
Building a Repeatable Test
A useful insulation test begins by controlling the variables that can otherwise hide differences between prototypes. The same room or chamber, same product load, same gel packs, same starting temperature, same bag capacity, and same opening schedule should be used whenever two constructions are compared.
| Test Variable | Example Controlled Condition | Purpose |
|---|---|---|
| Ambient temperature | 25°C ± 2°C | Establishes external thermal load |
| Product start temperature | 4°C ± 1°C | Keeps starting contents comparable |
| Cold source | Same pack model and mass | Controls cooling capacity |
| Bag fill | Same products and total mass | Controls thermal mass |
| Sensor position | Center and upper zone | Tracks internal temperature |
| Reading times | 0, 1, 2, 4, 6, 8 hours | Produces a temperature curve |
| Opening schedule | Closed or fixed timed cycles | Controls air exchange |
| Test duration | Defined before testing | Prevents selective reporting |
These values are example development conditions rather than a universal cooler-bag testing standard. A real project may require different temperatures, durations, sensor positions, or acceptance limits depending on how the product will be used.
The important feature is repeatability. If Prototype A uses more frozen packs or starts at a lower temperature than Prototype B, the comparison cannot reliably identify which insulation structure performs better.
Temperature Curves Matter More Than One Number
A claim such as “eight hours cold” leaves several unanswered questions. It does not say what temperature counted as cold, where the temperature was measured, how warm the surrounding environment was, whether the bag was opened, or how much ice was used.
A temperature curve gives much more useful information. If two samples begin at 4°C and remain close for the first two hours but begin separating after four hours, the development team can see where the behavior starts to change. That makes it easier to investigate differences in foam thickness, lid insulation, zipper geometry, base construction, or cold-source distribution.
Changing one important variable at a time makes prototype testing even more useful. The first sample can establish the baseline. The second can change only the foam thickness. The third can retain that foam but improve the lid. The fourth can modify the closure area.
This approach is slower than making several changes at once, but it produces much clearer evidence. When a new sample performs better, the development team can identify the change that caused the improvement rather than guessing which of five simultaneous modifications was responsible.
Construction Checks Before Thermal Testing
Thermal testing should not begin until the physical samples have been checked because a performance result is difficult to interpret if the bags are not built consistently. Foam thickness should be measured at representative locations, the liner should be checked for damage, and the zipper should close smoothly without distorting the lid.
Dimensions and capacity should also be verified. A slightly smaller bag can sometimes appear to perform better simply because it contains less internal air or exposes less surface area. If two prototypes are intended to be the same size, that difference should be eliminated before comparing their temperature curves.
Useful construction checks include foam thickness, liner condition, zipper open-close function, seam condition, finished dimensions, capacity, bottom stability, lid alignment, and leakage performance where relevant. Handle and shoulder-strap attachments should also be inspected because heavy loading can distort a weak bag and change closure geometry.
These checks do not replace insulation testing. They make the insulation test more meaningful by confirming that the physical construction being tested is known and documented.
From Sample Test to Production Specification
The purpose of prototype testing is not merely to produce one impressive sample. The more important goal is to create a construction that can be repeated during mass production and reproduced again when the product is reordered months later.
Once the preferred prototype is approved, its key insulation and construction details should be recorded. The documentation may include outer fabric, coating, foam family, nominal foam thickness, liner, zipper type, base reinforcement, panel construction, dimensions, and important assembly details.
A BOM identifies the approved materials, while the approved sample provides a physical reference. Pattern records and construction notes help prevent foam from being shortened, omitted, or substituted in areas where the final appearance might remain similar but thermal performance could change.
Production inspections can then check measurable characteristics such as foam thickness, zipper function, liner condition, dimensions, seam quality, and panel structure. Where insulation performance is commercially important, selected production samples can also be compared with the approved prototype using the same test procedure.
For custom cooler development, this is far more useful than asking a manufacturer simply for “good insulation.” The product team can define a target use case, approve a material system, validate it through a controlled sample, and then turn that approved construction into a repeatable production requirement.
Cooler bag insulation becomes much easier to understand once the silver lining stops being the center of the story. The foam slows heat moving through the walls, the liner manages moisture and cleaning, the closure controls air exchange, the shape affects exposure and stability, and the ice or gel packs provide the actual cold source. Each part performs a different job, and the final result comes from how those jobs work together.
That is also why the best cooler is not automatically the one with the thickest walls, the most expensive liner, or the strongest marketing claim. A lunch bag used for a short commute, an outdoor cooler used for a full afternoon, and a delivery bag opened repeatedly throughout a shift need different solutions. Strong product development begins by defining the real use condition, building the insulation system around it, and verifying the finished sample under repeatable conditions before production begins.
FAQ: How does a cooler bag keep food cold?
A cooler bag keeps food cold by slowing the rate at which external heat reaches the chilled contents. Foam insulation reduces heat moving through the walls, the liner helps manage moisture and part of the radiant heat load, and the closure limits warm-air exchange. Ice or frozen gel packs provide the cold source. The bag itself does not generate cooling, so chilled starting products and an appropriate cold source usually improve real-world performance.
FAQ: What is the best insulation material for a cooler bag?
There is no single insulation material that is best for every cooler. PE and EPE are widely used in lightweight everyday designs, XPE can provide greater structural stability, EVA is useful for firmer and semi-rigid constructions, and PU-based systems may suit more demanding thermal applications. Thickness, density, bag size, lid design, closure quality, weight, cost, and intended use should all be considered before selecting the insulation.
FAQ: Is aluminum foil enough to insulate a cooler bag?
Aluminum-foil-type liners can contribute to radiant heat control and provide a practical wipe-clean surface, but they should not normally be treated as the primary insulation layer. Much of the resistance to heat moving through a soft cooler wall comes from the foam behind the liner. A thin bag with a reflective interior can still warm quickly if the foam, lid, seams, or closure system are poorly designed.
FAQ: Does thicker foam keep a cooler cold longer?
Using thicker foam of the same material will generally increase resistance to conductive heat flow, but it does not guarantee a specific cold-retention time. Zipper sealing, lid insulation, panel continuity, bag volume, foam density, starting temperature, ice-pack quantity, opening frequency, and ambient temperature also affect performance. Prototype comparison testing is therefore more reliable than choosing a foam thickness based only on an expected number of hours.
FAQ: How long can an insulated cooler bag stay cold?
There is no reliable universal number because cold-retention time changes with bag construction and test conditions. A cooler loaded with pre-chilled drinks and several frozen packs in a 22°C room will behave differently from the same cooler containing warm products in direct summer heat. Useful retention claims should state the ambient temperature, starting product temperature, cold-source quantity, opening schedule, test duration, and temperature threshold used.
FAQ: Are PEVA and TPU liners waterproof?
PEVA and TPU materials can provide strong moisture resistance, but the material property should not automatically be applied to the entire finished bag. Needle holes, stitched seams, zipper areas, corners, bindings, and transitions between panels can create leakage paths. If a cooler is expected to contain melted ice or liquid, the complete compartment construction should be evaluated rather than relying on the liner material name alone.
FAQ: How should a custom cooler bag be tested before mass production?
A useful development test controls ambient temperature, starting load temperature, product mass, gel-pack quantity, sensor position, opening schedule, and test duration. The approved sample should also be checked for foam thickness, liner condition, zipper operation, seam quality, dimensions, capacity, lid alignment, and leakage where relevant. Once the preferred construction is validated, those materials and structural details can be recorded in the production specification for repeat orders.


