 Skip to content
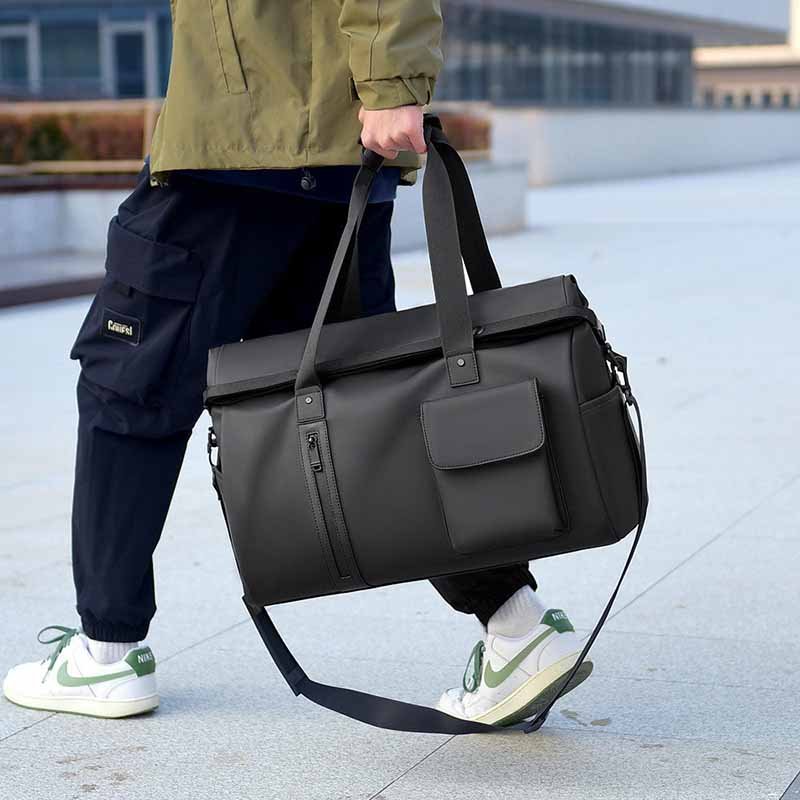
A bag handle can look thick, feel solid, and still fail much sooner than expected. The reason is that the visible handle is only one part of a much larger load-bearing structure. Every time a loaded bag is lifted, force travels from the handle through stitching, bartacks, reinforcement panels, hardware, seams, and finally into the surrounding body material. If any one of those elements is weaker than the others, that point can become the true limit of the finished product.
A reliable bag handle strength test evaluates the complete load path rather than the handle material alone. The finished bag should be tested under a defined load using static holding, controlled pulling, repeated lifting, and shock loading where appropriate. Inspectors should check not only for breakage, but also stitch movement, fabric tearing, hardware deformation, attachment displacement, excessive elongation, and permanent structural distortion.
This is especially important during product development. A tool bag may use extremely strong webbing but still tear where that webbing is attached to a lightweight panel. A travel bag may survive one heavy lift yet develop loose stitching after repeated use. A cooler bag that feels light when empty can become much heavier after bottles, food, and ice packs are added. The real question is therefore not simply, “Is the handle strong?” It is, “Where does the entire carrying structure begin to lose strength under the way this bag will actually be used?”
What Determines Bag Handle Strength?

Bag handle strength is determined by the complete load-bearing system, including handle material, webbing construction, stitching, bartacks, reinforcement panels, hardware, attachment geometry, and the strength of the bag body. A strong strap can still produce a weak finished bag if the attachment area, seam, reinforcement, or surrounding fabric cannot transfer the load safely and repeatedly.
Handle Material and Webbing
The handle material is the most visible part of the system, but it is rarely the only factor limiting performance. Nylon, polyester, polypropylene, cotton webbing, folded shell fabric, PU, and leather all respond differently to load. Their behavior depends on fiber type, yarn construction, weave density, width, thickness, finishing, surface friction, and how the material is integrated into the final structure.
For heavier applications, manufacturers may use high-tenacity nylon, high-strength polyester, seatbelt-style webbing, or other industrial webbing constructions. Widths such as 25 mm, 38 mm, 50 mm, 75 mm, and 100 mm are commonly available in heavy-duty categories, while thickness may fall around 1.5 mm to 3.0 mm depending on the intended structure. These dimensions describe the component, however, and should not be treated as a finished-bag load rating without testing. Lovrix documentation similarly states that heavy-duty webbing strength should be evaluated together with stitching, bartacks, hardware, load direction, and the actual use case rather than inferred from width alone.
A wider strap can improve comfort and may provide more material to carry the load, but width by itself is not a reliable predictor of final strength. A tightly woven 38 mm high-tenacity polyester strap may perform better than a wider but lighter construction. An extremely stiff strap can also create new problems by concentrating stress at the point where the flexible handle becomes fixed to a softer bag body.
Stitching and Load Transfer
Stitching does more than keep two components together. In a handle assembly, stitching transfers force from one material into another. The shape and size of the sewn area therefore influence how evenly that force is distributed through the bag. Common constructions include box stitching, X-box stitching, bartacks, double-row stitching, reinforcement patches, webbing extensions into side seams, and long webbing runs that continue farther down the bag body.
A short handle attachment concentrates force into a relatively small area. Extending the webbing or reinforcement over a larger panel can spread that force more gradually, provided the surrounding material is strong enough to support it. This is one reason that cooler bags, heavy travel bags, delivery bags, and tool bags often require more deliberate attachment construction than lightweight totes or cosmetic bags.
More stitching is not always better. On lightweight shell materials, extremely dense stitching can place so many needle holes close together that the fabric begins to behave like a perforated sheet. Under load, the thread may remain intact while the base material tears around it. Reliable construction therefore requires a balance between stitch strength, stitch density, reinforcement area, thread selection, and the tear resistance of the material being sewn.
Reinforcement and Hardware
Reinforcement patches are used to spread load away from a small attachment point and into a wider section of the bag body. Their effectiveness depends on size, material, stiffness, location, seam construction, and how the patch interacts with the shell fabric. A patch that is much stiffer than the surrounding material can sometimes create a sharp transition where repeated bending eventually starts a tear along the patch edge.
Hardware should be treated in exactly the same way. D-rings, rectangular rings, swivel hooks, buckles, ladder locks, rivets, and other fittings all become part of the carrying structure. A heavy-duty strap connected to a weak metal ring still creates a weak system. Likewise, a strong ring mounted on a small fabric tab can simply move the failure point from the hardware to the tab.
Adjustable components introduce another risk: slippage. The hardware may not break, yet the webbing can move through the adjuster under load if the surface, thickness, or geometry is poorly matched. This is why component selection should consider not only breaking strength but also the way all parts behave together after assembly.
| Component | Main Variables | Common Failure Risk |
|---|---|---|
| Webbing | Fiber, weave, width, thickness | Stretching, fraying, rupture |
| Stitching | Pattern, density, thread, sewing area | Broken or loose stitches |
| Bartacks | Position, length, quantity | Localized fabric tearing |
| Reinforcement | Size, stiffness, placement | Edge tearing or separation |
| Hardware | Material, shape, compatibility | Bending, opening, slippage |
| Shell fabric | Tear resistance, weave, coating | Pull-out or rupture |
| Attachment geometry | Angle, spacing, load direction | Uneven stress concentration |
Bag Type and Intended Load
Handle design should begin with the product’s actual use rather than a generic idea of strength. A promotional tote may carry lightweight purchases for short periods, while a cooler bag can become surprisingly heavy once beverages, food, and cooling packs are added. Tool bags carry dense objects, delivery bags are handled repeatedly, and travel bags can be lifted at awkward angles by owners, drivers, or baggage handlers.
The expected load is only one part of that analysis. Carrying frequency, load distribution, handle spacing, number of handles, carrying angle, hardware, and how often one handle may temporarily carry the full weight all influence the stress placed on the structure. A design that works well for a fashion tote should not automatically be transferred to a large equipment case simply because the handles look similar.
A practical product review asks several questions early: What will users normally put inside the bag? Is the load dense or bulky? Will both handles usually be used together? Could one side briefly support most of the weight? Is the handle sewn directly to the shell or connected through hardware? How often will the bag be lifted during a normal day? These questions define the testing problem much more accurately than strap width alone.
Which Bag Handle Strength Tests Are Used?

Common bag handle evaluations include static load testing, controlled pull testing, attachment strength checks, hardware pull testing, repeated lifting, and shock or snatch-style testing. Each method reveals a different weakness. Static loading checks sustained carrying, pulling identifies structural limits, repeated lifting exposes fatigue, and shock testing examines sudden forces that may never appear during slow loading.
Static Load Testing
Static load testing is one of the most practical starting points because it evaluates the finished bag under a sustained load. The sample is filled according to a defined test condition and suspended or held by its normal carrying handles. The observation period should be long enough to reveal meaningful deformation based on the project requirement, rather than simply proving that the bag can survive a few seconds of lifting.
Inspectors should not wait until the handle completely separates. Early signs often provide more useful information. Handle elongation, stitch movement, whitening around needle holes, reinforcement distortion, seam opening, fabric stretching, and hardware rotation can all indicate that one area is carrying more stress than intended. These changes may appear long before final breakage.
The test load should be connected to the intended product specification, customer requirement, risk level, or recognized test method where one applies. There is no single responsible kilogram value for every bag type. A cotton tote, travel duffel, cooler bag, tool bag, backpack, and medical bag all have different loading conditions, and the test should reflect those differences.
Pull and Attachment Testing
A controlled pull test applies increasing force to the handle or strap assembly so that engineers can observe where the structure begins to deform, slip, tear, or fail. This can be useful when comparing two prototypes that look nearly identical. The stronger construction may not be the one with the thickest strap; it may simply distribute force more effectively through the attachment area.
Attachment testing focuses more specifically on the connection between the handle and the main product. Typical points include handle roots, D-ring tabs, sewn loops, side-seam attachments, riveted connections, and reinforcement patches. A strap can have excellent tensile strength while its fabric attachment tears at a much lower force, which is why component test data should not be used as a substitute for finished-product testing.
When metal or plastic hardware is included, separate pull checks may also be useful. The fitting itself, the folded webbing around it, the stitch holding that fold, and the fabric tab securing the fitting to the bag all need to remain stable. A good test report therefore records not only the applied force or test condition, but also the exact point where the first meaningful damage appears.
Repeated Lifting and Fatigue
Many handle failures are fatigue problems rather than immediate strength problems. The product works well when new, survives the first several uses, and then slowly develops damage as the same load passes through the same attachment points again and again. Repeated lifting tests are designed to make this process easier to observe under controlled conditions.
A typical cycle lifts the loaded sample using the intended carrying points and then lowers it again. The exact number of cycles should come from the project requirement or test method, but consistency matters more than creating an impressive number. When samples are tested under the same conditions, engineers can compare when deformation first appears and how quickly it progresses.
Symptoms can include enlarged stitch holes, loose thread, edge fraying, webbing folding, reinforcement movement, coating wear, hardware abrasion, and permanent elongation. These effects are especially relevant for delivery bags, travel bags, tool bags, work bags, and other products that may be picked up many times during normal use.
Shock and Snatch Testing
Slow lifting and sudden lifting do not create the same stress. When a bag is raised gradually, the force builds relatively smoothly. If a loaded bag begins moving and is then stopped suddenly by the handle, the attachment experiences a much sharper short-duration load. This can expose weaknesses that remain hidden during a calm static test.
Shock or snatch-style testing is useful for products that may be handled abruptly, including luggage, travel bags, tool bags, delivery bags, and outdoor equipment. The exact method should be defined carefully because uncontrolled dropping does not produce repeatable information. What matters is a consistent loading event that can be reproduced across samples or construction revisions.
After each defined shock event, the sample should be inspected at the handle root, bartacks, reinforcement edges, surrounding shell fabric, hardware, and seam transitions. Sudden damage may show up as immediate seam opening, hardware deformation, reinforcement tearing, or permanent elongation that was not present during a gradual load.
| Test Type | Main Purpose | What It Can Reveal |
|---|---|---|
| Static load | Sustained carrying performance | Stretch, seam opening, distortion |
| Pull test | Structural strength limit | Tearing, slipping, component failure |
| Attachment test | Connection security | Handle-root or tab failure |
| Hardware pull | Fitting integrity | Bending, opening, slippage |
| Repeated lifting | Fatigue durability | Progressive stitch or fabric damage |
| Shock test | Sudden-force resistance | Abrupt tearing or attachment failure |
No single test can answer every durability question. The most useful combination depends on how the bag will be carried, how heavy it becomes in normal use, how frequently it is handled, and what the consequences would be if one part of the carrying system failed.
How Do You Perform a Bag Handle Load Test?

A practical bag handle load test starts by defining the intended load, preparing a representative finished sample, distributing the weight realistically, and loading the bag through its normal carrying points. During and after the test, inspect elongation, seam opening, stitch movement, reinforcement damage, hardware deformation, and permanent distortion. The load, setup, duration, and acceptance rules should be documented before testing.
Define the Test Condition
The first step is deciding what the test is meant to prove. Choosing an arbitrary large weight may create an impressive demonstration, but it does not necessarily provide useful product information. The test should reflect the bag’s intended commercial use, normal contents, foreseeable heavier loading, carrying configuration, and the way the handles interact with the rest of the structure.
A travel bag filled with clothing behaves differently from a tool bag containing metal equipment, even when their total weight is the same. Dense contents can create concentrated forces in the bottom or side panels, while soft contents may distribute the load more evenly. Cooler bags can also become much heavier in use than their appearance suggests because liquids and cooling packs add considerable mass.
The specification should state whether both handles are used together, whether a single handle may be tested separately, and whether a shoulder strap or hardware connection shares the load. Testing one handle can be useful if users are likely to lift the bag that way, but it should not automatically be treated as a universal requirement for products designed to be carried through two handles simultaneously.
Prepare and Load the Sample
The sample should be inspected and recorded before loading begins. Handle position, sewing pattern, bartack location, reinforcement dimensions, hardware condition, strap length, seam alignment, and overall appearance should all be documented. If several prototypes are being compared, each sample should have a clear reference so the test result can be tied back to the exact construction revision.
Where practical, the test mass should be distributed in a way that resembles real use. Placing one dense weight directly beneath a single handle can create an unrealistic stress concentration unless that condition is intentionally being tested. The goal is to reproduce the product’s expected loading pattern in a controlled way.
Once loaded, lift or suspend the bag through the intended carrying points and observe it immediately. Unequal handle stretch, unusual hardware rotation, bag-body tilting, or asymmetric attachment movement can reveal problems even before visible damage develops. Continue observations during the defined holding period, then inspect the sample again after the weight is removed.
Inspect More Than Breakage
A complete break is only one possible failure. Many quality problems appear earlier and are more useful for improving the design. Webbing can lengthen permanently, stitching can migrate, bartacks can distort, fabric can whiten around needle holes, reinforcement can shift, hardware can bend, and the bag body can become permanently misshapen while the handle still remains attached.
These changes should be recorded because they show which component is approaching its functional limit. A premium travel bag may be considered unacceptable if the attachment area becomes visibly distorted even though the handle remains usable. A rugged utility bag may allow more cosmetic change if the agreed performance specification permits it.
Typical observations include:
- Handle elongation
- Webbing fraying
- Broken or loose thread
- Enlarged stitch holes
- Bartack distortion
- Shell fabric tearing
- Reinforcement movement
- Hardware bending
- Rivet loosening
- Strap slippage
- Attachment displacement
- Permanent body deformation
The acceptance criteria should therefore reflect both structural performance and the expected visual quality of the product.
Record the Result
A useful test record should make it possible for another person to understand exactly what was tested and reproduce the process. At minimum, it should identify the sample, load, loading method, carrying configuration, duration or cycle count, handle construction, observed deformation, failure location, and overall result. Photographs taken before, during, and after testing can be especially valuable when comparing prototype versions.
Avoid vague descriptions such as “handle failed.” A more useful note would state that the webbing remained intact while the outer shell began tearing along the upper edge of the reinforcement patch, or that the bartack thread opened at the front-left attachment while the opposite side remained stable. Specific observations point directly toward corrective action.
Lovrix’s documented quality-control framework includes load-bearing verification, strap pull testing, hardware fastness checks, sewing inspection, and staged control before shipment rather than relying only on a final visual inspection. That type of record-based process is particularly useful when a successful sample must later be reproduced consistently in larger production quantities.
How Do You Test Handle Attachments and Stitching?

Handle attachment testing applies controlled force through the finished carrying system while closely watching the handle roots, seams, bartacks, tabs, reinforcement panels, hardware connections, and surrounding shell fabric. The objective is to identify where load transfer first causes movement or damage, because the attachment often reaches its limit before the handle material itself breaks.
Check the Handle Root
The handle root is one of the most important areas to inspect because it is where a flexible strap becomes fixed to the bag. This transition creates concentrated stress and repeated bending. Even when the middle of the strap remains under relatively even tension, the handle root has to transfer that force through stitches and into a material that may behave very differently.
Inspect more than the visible bartack. Look at the distance between the attachment and nearby seams, the direction of the webbing, reinforcement edges, stitch alignment, and whether the force enters the bag body gradually or abruptly. Attachments placed too close to an edge or seam can create stress concentration that may not be obvious when the bag is empty.
For heavier applications, extending the webbing into a side seam or farther down the bag body can distribute force over a larger area. Some constructions use bottom-to-top continuous webbing or large reinforcement panels for the same reason. The goal is not simply to make the handle look heavier, but to give the load a larger and more stable path into the product.
Evaluate Bartacks and Stitch Patterns
Bartacks are widely used in high-stress areas because they place dense stitching across a relatively small space. Their performance depends on position, length, thread, sewing consistency, underlying material strength, and the direction of the applied load. A well-made bartack placed in the wrong location may still provide poor reinforcement.
Box stitching and X-box stitching are useful when a larger attachment area is available. They spread stitches over a broader surface and can be combined with reinforcement patches or additional rows of sewing. Double-row stitching can also provide redundancy, while longer webbing extensions can move the highest stress away from the edge of the panel.
The substrate remains important. Adding more bartacks to weak shell fabric can make the situation worse if the dense needle pattern creates a tear line. If the shell begins failing around intact thread, the solution may be a larger reinforcement area, stronger base fabric, different stitch density, or a change in attachment geometry rather than simply stronger thread.
Inspect the Surrounding Fabric
One of the most informative test results occurs when the handle and stitches remain intact but the fabric around them begins to fail. This tells the product team that the problem is not the visible strap. The load has simply reached a part of the shell that cannot support the stress being transferred through the attachment.
Early signs may include whitening, stretched weave, enlarged needle holes, coating cracks, permanent wrinkles, and a small tear beginning at the corner of the reinforcement. These details matter because a tiny local change can become a larger structural failure after repeated use.
The same attachment can behave differently when used on different materials. A construction that performs well on heavy canvas should not automatically be copied onto lightweight polyester, coated nylon, PU, or a highly flexible laminated material. Each substrate has its own tear resistance, stiffness, coating behavior, and response to concentrated stitches.
When changing the shell material during development, the load-bearing structure should therefore be reviewed again rather than treated as unchanged.
Test Hardware Connections
Hardware creates additional load-transfer points, so the fitting and the textile structure around it should be tested as one assembly. D-rings, rectangular rings, swivel hooks, buckles, ladder locks, rivets, and loops can all fail in different ways. The metal may bend, the hook may open, the adjuster may slip, or the fabric tab securing the hardware may tear.
Inspectors should check whether hardware edges abrade the webbing, whether folded webbing shifts under load, whether rivet holes enlarge, and whether adjustable straps remain in position. Coating damage on a metal component may also indicate repeated friction that could eventually affect the surrounding textile material.
A stronger fitting is not always the answer. If the hardware remains intact while the tab holding it pulls from the bag body, increasing the metal strength will not solve the root problem. The connection must be evaluated from the strap through the fitting and all the way into the stable part of the shell.
How Do You Test Repeated and Shock Loads?
Repeated-load testing applies the same lifting action many times to reveal fatigue, while shock testing introduces sudden force that gradual loading may not reproduce. These methods are especially useful for travel bags, tool bags, cooler bags, delivery bags, backpacks, and other products exposed to frequent handling, heavy contents, abrupt pickup, or repeated movement during normal use.
Repeated Lifting
Repeated lifting is designed to reveal damage that develops gradually instead of appearing during the first load. The sample is loaded and then lifted and lowered through its normal carrying points according to the specified cycle. The exact number of cycles should come from the project requirement or applicable method, but every cycle should be performed consistently if different samples are being compared.
Periodic inspections are useful because they show when the first signs of fatigue appear. A handle may look perfect early in the test but later develop loose thread, enlarged stitch holes, frayed webbing, reinforcement movement, coating wear, or permanent elongation. Recording when these changes begin provides more information than examining only the final sample.
Products that are handled frequently deserve extra attention. A delivery bag may be picked up many times during one working day. Tool bags are often loaded with dense objects and lifted repeatedly. Travel bags move between floors, vehicles, conveyor systems, hotels, and storage areas. In these categories, fatigue performance can be just as important as the maximum force survived during a single test.
Fatigue at the Attachment
Fatigue often begins where materials with different stiffness meet. A flexible strap can repeatedly bend against a stiff reinforcement patch. A metal ring can rub against the same fabric tab every time the bag moves. A coated fabric can crease repeatedly along the edge of a bartack or reinforcement panel until the surface begins to crack.
These mechanisms are difficult to identify from a new sample. The structure may look clean and feel strong, yet small repeated movements can gradually enlarge holes, loosen thread, wear coatings, or damage fibers. Repeated testing makes that progression easier to observe before mass production.
Comparing both sides of the bag is also useful. If one attachment shows noticeably more movement than the other, the problem may involve sewing position, handle symmetry, reinforcement placement, or uneven load distribution rather than the material itself. That distinction matters because the corrective action will be different.
Shock Loading
Shock loading examines what happens when force arrives suddenly. The concept is important because the weight of the contents is only one part of the stress placed on a handle. Movement and acceleration can create a much sharper force than a slow lift, even when the total mass inside the bag has not changed.
A travel bag lifted gradually from the floor may perform well under a static test. If it is grabbed quickly while moving downward, the handle attachment can experience a very different event. The same applies when a tool bag is lifted abruptly from a vehicle or a delivery bag is caught by one handle.
A controlled shock test should therefore use a repeatable setup rather than random dropping. After each defined event, inspect the handle root, bartacks, reinforcement edges, hardware, shell material, and strap length. Sudden failures often show up as immediate seam opening, hardware deformation, reinforcement tearing, or permanent elongation.
Match Testing to Real Use
Controlled testing is valuable because it creates repeatable data, but real-use evaluation adds another layer of information. A fixture may show that the handle survives a load while failing to reveal that the grip twists badly, cuts into the user’s hand, rotates the bag, or causes one attachment to carry substantially more weight than the other.
Development samples can therefore be filled with representative contents and carried normally after controlled tests. A cooler bag may show different handle behavior once the body is fully expanded. A tool bag may reveal uneven loading when heavy objects shift to one side. A travel duffel may show that one handle naturally takes more force because of attachment placement.
Laboratory-style checks and practical carrying trials should support each other. Controlled testing provides comparison and evidence, while real-use evaluation helps confirm that the chosen test condition represents the way the product will actually be handled.
What Counts as a Pass or Failure?
A handle-strength test passes when the sample meets the predefined requirements for load, duration or cycle count, structural integrity, deformation, and appearance. Failure can include broken webbing, open stitching, torn fabric, failed bartacks, loose reinforcement, deformed hardware, excessive permanent elongation, or unacceptable attachment movement. Pass/fail rules should be agreed before the test begins rather than decided afterward.
Define Failure Before Testing
The word “pass” means very little unless the acceptance criteria are clear. Complete separation is obviously a failure, but many commercially important problems occur long before the handle falls off. An attachment can shift several millimeters, a metal ring can bend, a seam can open slightly, or the shell can become permanently wrinkled while the bag remains technically usable.
Whether those changes are acceptable depends on the product category, target market, quality level, and agreed specification. A premium travel bag may require a clean post-test appearance with very limited permanent deformation. A rugged tool bag may permit more cosmetic change while still requiring strong structural performance.
The specification should therefore describe both functional and visual acceptance. That can include maximum allowable movement, whether any broken stitches are permitted, whether hardware deformation is acceptable, and whether permanent changes in handle length or attachment position are allowed after unloading.
Clear criteria prevent disagreement later between development, production, inspection, and the customer.
Record the Failure Mode
Failure classification should be specific enough to guide corrective action. “Handle failed” does not explain whether the strap ruptured, the shell tore, the hardware bent, the thread broke, or the adjuster slipped. Each of those outcomes points toward a different engineering solution.
| Failure Mode | Area to Review | Typical Corrective Direction |
|---|---|---|
| Webbing breaks | Webbing specification | Fiber, weave, width, thickness |
| Stitch thread breaks | Sewing construction | Thread, pattern, sewing area |
| Fabric tears around bartack | Shell and reinforcement | Increase load-distribution area |
| Reinforcement separates | Patch construction | Material, size, stitch layout |
| Hardware bends | Fitting specification | Stronger or better geometry |
| Strap slips | Webbing and adjuster match | Improve compatibility |
| Attachment tab pulls out | Connection geometry | Longer or stronger attachment |
| Permanent handle stretch | Handle material | Different webbing construction |
The first component to reach its limit is usually the most useful clue. If the webbing remains undamaged while the shell tears, upgrading the webbing again will probably increase cost without fixing the problem. If an adjuster slips, adding more bartacks at the handle root may have little effect.
Root-cause analysis keeps corrective work focused and helps avoid overbuilding the entire product unnecessarily.
Improve Failed Samples
Corrective action should follow the observed failure mechanism. Webbing rupture may require a change in fiber type, weave, width, or thickness. Stitch failure may require different thread, sewing layout, stitch density, machine settings, or a larger sewn area. Shell tearing around intact stitches usually points toward reinforcement or load-distribution problems.
Hardware deformation may require a different ring, buckle, hook, rivet, or material specification. Slippage can result from poor compatibility between an adjuster and the surface or thickness of the webbing. A tab pulling out may require more attachment length or a change in the direction through which force enters the bag.
Attachment geometry can sometimes deliver a large improvement without adding much material. Moving the handle farther from an edge, extending webbing deeper into the body, increasing the reinforcement area, or changing the angle of the load path can improve performance more efficiently than simply making every component heavier.
A failed prototype should be treated as useful information. The practical sequence is to test, identify the first meaningful failure, modify the relevant part, produce another representative sample, and test again.
Control the Approved Structure in Production
A successful prototype only solves half of the problem. The approved structure must also be reproduced consistently during bulk production. Normal manufacturing variation can affect webbing lots, hardware batches, stitch position, thread tension, bartack placement, seam allowance, reinforcement alignment, and handle symmetry.
Critical load-bearing details should therefore be locked before production begins. These usually include webbing material, width and thickness, handle length, attachment location, stitch pattern, bartack position, reinforcement size, hardware specification, seam structure, and any required project-specific test condition.
Quality control can then confirm these details at appropriate stages. Incoming inspection verifies materials and hardware. First-piece approval checks that the intended attachment structure has been translated correctly onto the production line. In-line inspection can catch misplaced bartacks, incorrect reinforcement, uneven handles, or loose sewing before large quantities are completed.
Final inspection should confirm that the approved construction has been maintained and that any required sampled pull, load-bearing, or hardware checks have been completed according to the project requirement. Quality control reduces risk most effectively when it begins before production rather than functioning only as a final gate.
A reliable bag handle is rarely created by one oversized strap, one heavy bartack, or one impressive material specification. It is the result of a complete load path in which handle material, sewing, reinforcement, hardware, shell structure, testing, and production control all support one another. The most useful strength test does not ask how large a number can be printed on a specification sheet. It asks whether the finished bag behaves as intended when people fill it, lift it, carry it, set it down, and repeat that cycle through real use. When that process is evaluated during development and preserved through production, handle strength becomes a controlled product characteristic rather than a hopeful assumptio
How much weight should a bag handle strength test use?
There is no single test weight that is appropriate for every bag. The load should be selected from the product’s intended capacity, expected contents, carrying configuration, customer specification, risk level, and any applicable test method. A lightweight tote and a tool bag should not automatically use the same target. It is also important to define whether the load is applied through one handle, two handles together, a shoulder strap, or another carrying point.
Is a wider bag handle always stronger?
A wider handle is not automatically stronger because width is only one variable. Fiber type, yarn quality, weave construction, thickness, stitch area, reinforcement, hardware, and the surrounding shell all influence the finished result. Wider webbing may improve comfort and can provide more material for carrying load, but a narrower high-tenacity construction may still outperform a wider lightweight strap. Finished-product testing is therefore more useful than comparing width alone.
What is the difference between a handle pull test and a load test?
A load test usually checks how the finished bag behaves while carrying a defined weight for a specified condition, while a pull test applies controlled force to the handle or attachment and can be used to identify where deformation or failure begins. Both are useful, but they answer different questions. A bag may survive a normal static load yet show a weak attachment when subjected to a stronger controlled pull or repeated-use test.
Should bag handles be tested before mass production?
Handle performance is best evaluated during sample development before the final construction is locked for production. Testing at this stage makes it possible to adjust webbing, reinforcement, stitching, hardware, attachment position, or shell material while changes are still practical. Once an acceptable structure is approved, production controls should focus on reproducing the same details consistently and carrying out any required project-specific verification rather than redesigning the handle after bulk goods are completed.
Can strong webbing still produce a weak bag handle?
Yes. This is one of the most common misunderstandings in handle development. Strong webbing can still be attached to weak fabric, insufficient reinforcement, poorly placed bartacks, unsuitable hardware, or a connection that concentrates too much force in one area. In that situation, the strap remains intact while another part of the structure fails first. This is why webbing tensile strength should never be treated as the same thing as finished-bag carrying strength.
How can handle strength problems be reduced in bulk production?
The most effective approach is to lock the approved construction and control its critical details throughout manufacturing. Webbing type, attachment position, reinforcement dimensions, bartack placement, hardware, seam construction, and handle length should remain consistent with the approved sample. Incoming checks, first-piece approval, sewing inspection, in-line monitoring, and project-specific pull or load checks can help identify variation early, before a small construction difference becomes a large shipment-level quality problem.


